
How to Frame a Pastel Painting [ Step by Step ]
Last updated: January 2026
Frame pastel paintings on my own?
Yes, you can. I’ve got you.
Framing pastel paintings can feel intimidating if you’ve never done it before. They’re delicate, they’re dusty, and no one wants to ruin a beautiful piece of art.
The good news? You can frame pastel paintings yourself and it’s much easier (and more affordable) than you might think.
Below, I’ll walk you through exactly how I frame pastel paintings at home, step by step, using simple tools and materials you can find easily.

First things first: What if I damage the painting?
This is the question I hear most and I promise, you’re not alone.
Pastel paintings are delicate, but they’re not impossible to work with. I like to think of them as beautiful butterflies. You wouldn’t touch the wings, rub the surface, or shake them around and pastel paintings are the same.
Golden rules:
- Don’t touch the surface
- Handle by the edges
- Move slowly and intentionally
If you do that, you and the painting will be just fine.
How to Easily Frame Pastel Paintings at Home
1. Choose a frame with a mat (this part matters)
The mat is incredibly important when framing pastel artwork. Pastels shed tiny particles, and the worst thing you can do is press the artwork directly against the glass.
A mat (or spacer) keeps the painting safely away from the glass and gives it room to breathe.
Tip: It’s much easier to attach hanging hardware before framing—especially if you’re using less expensive frames.
Favorite places to find frames:
Locally look at Michaels, Hobby Lobby, TJMaxx, Homegood, and World Market (remember to look for wood frames and a frame with a mat most importantly)
- Michaels, Hobby Lobby, TJ Maxx, HomeGoods, World Market
(Look for wood frames with mats) - American Frame
- Amazon (search “{size} frame with mat”) like this example
-
Frame Destination

If you can, choose hardwood frames—they’re easier to work with and more durable.
2. Mount your painting using acid-free hinge tape
This is called the hinge tape method, and it’s very gentle on artwork.
Here’s how:
- Lay your painting on an acid-free backing board
(Many inexpensive frames come with non-archival backing—replace it if needed.) - Position the mat on top and lightly mark where the artwork should sit.
- Attach 2–3 small pieces of acid-free linen tape to the back of the artwork.
- Secure those tabs to the backing board—never tape all sides.
Why hinge tape matters: Paper expands and contracts with temperature and humidity. Leaving space near the corners prevents buckling (think of a sticky door in summer).
Recommended tape:
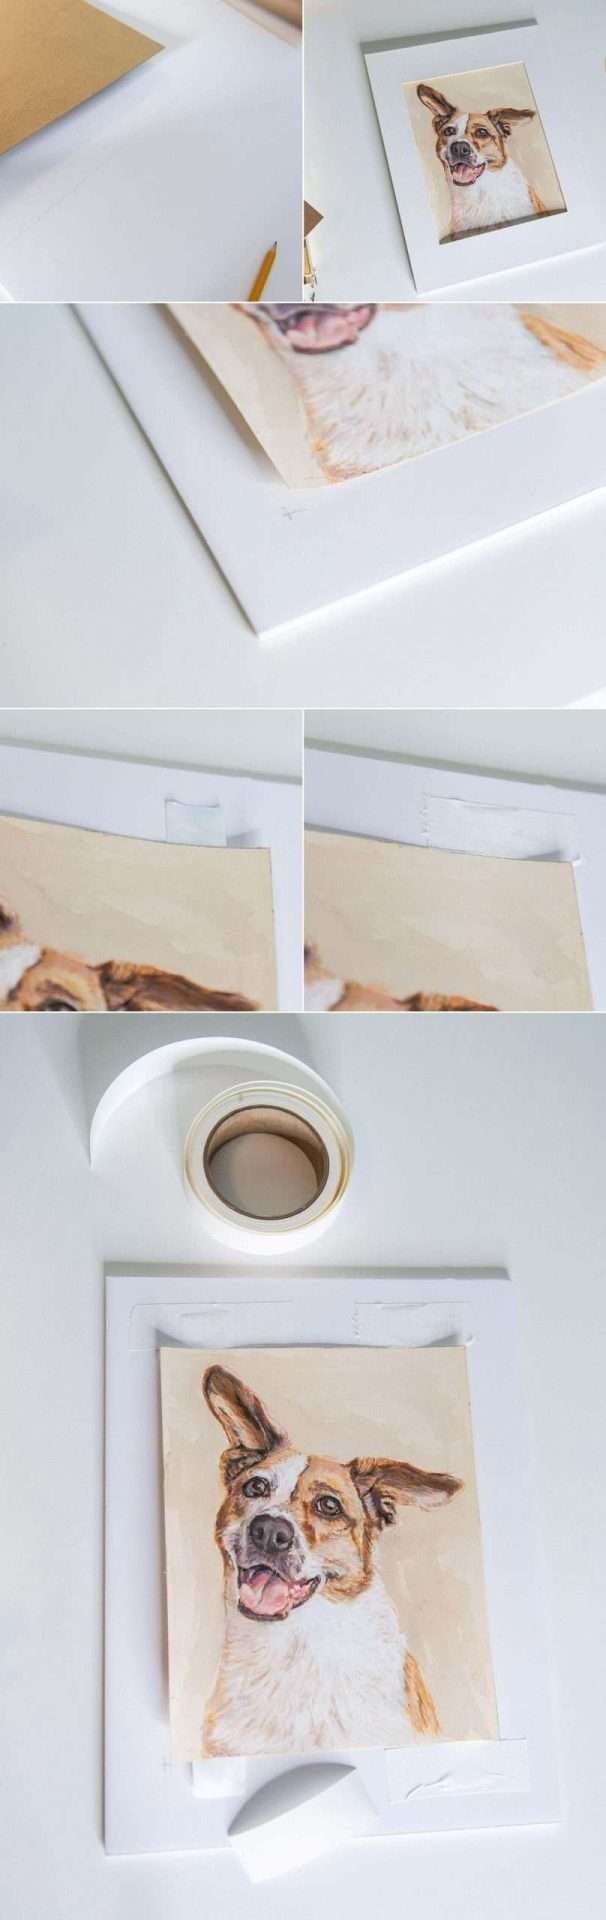
3. Add spacers to protect the artwork
Spacers keep dust from settling on the mat and prevent the artwork from pressing against the glass—especially helpful for larger pieces.
You can:
- Create your own using foam core or mat board
- Use plastic spacers (many frame shops sell them by the strip)
For small works, I often skip spacers if the mat is deep enough. Some frames simply don’t have the depth—so choose accordingly.
Here is some spacers:

4. Assemble the frame
- Lay the frame face-down
- Clean the glass with a lint-free cloth (no moisture left behind)
- Insert the mat + backing board “sandwich”
- Secure with frame points or clips (A screwdriver works better than fingernails—trust me)
Seal the back (optional, but recommended)
Sealing the back helps keep dust out long-term.
- Trace the frame onto brown paper
- Cut slightly smaller than the frame
- Attach with double-sided tape around the back edge
Since we added hardware earlier, cut around it or apply paper underneath.
Supplies:
- Brown Paper: Michaels, Hobby Lobby, Amazon
- Rubber Bumpers for Frame Corners: Amazon
- Wire and Hanging Hooks: Amazon , Home Depot, Target
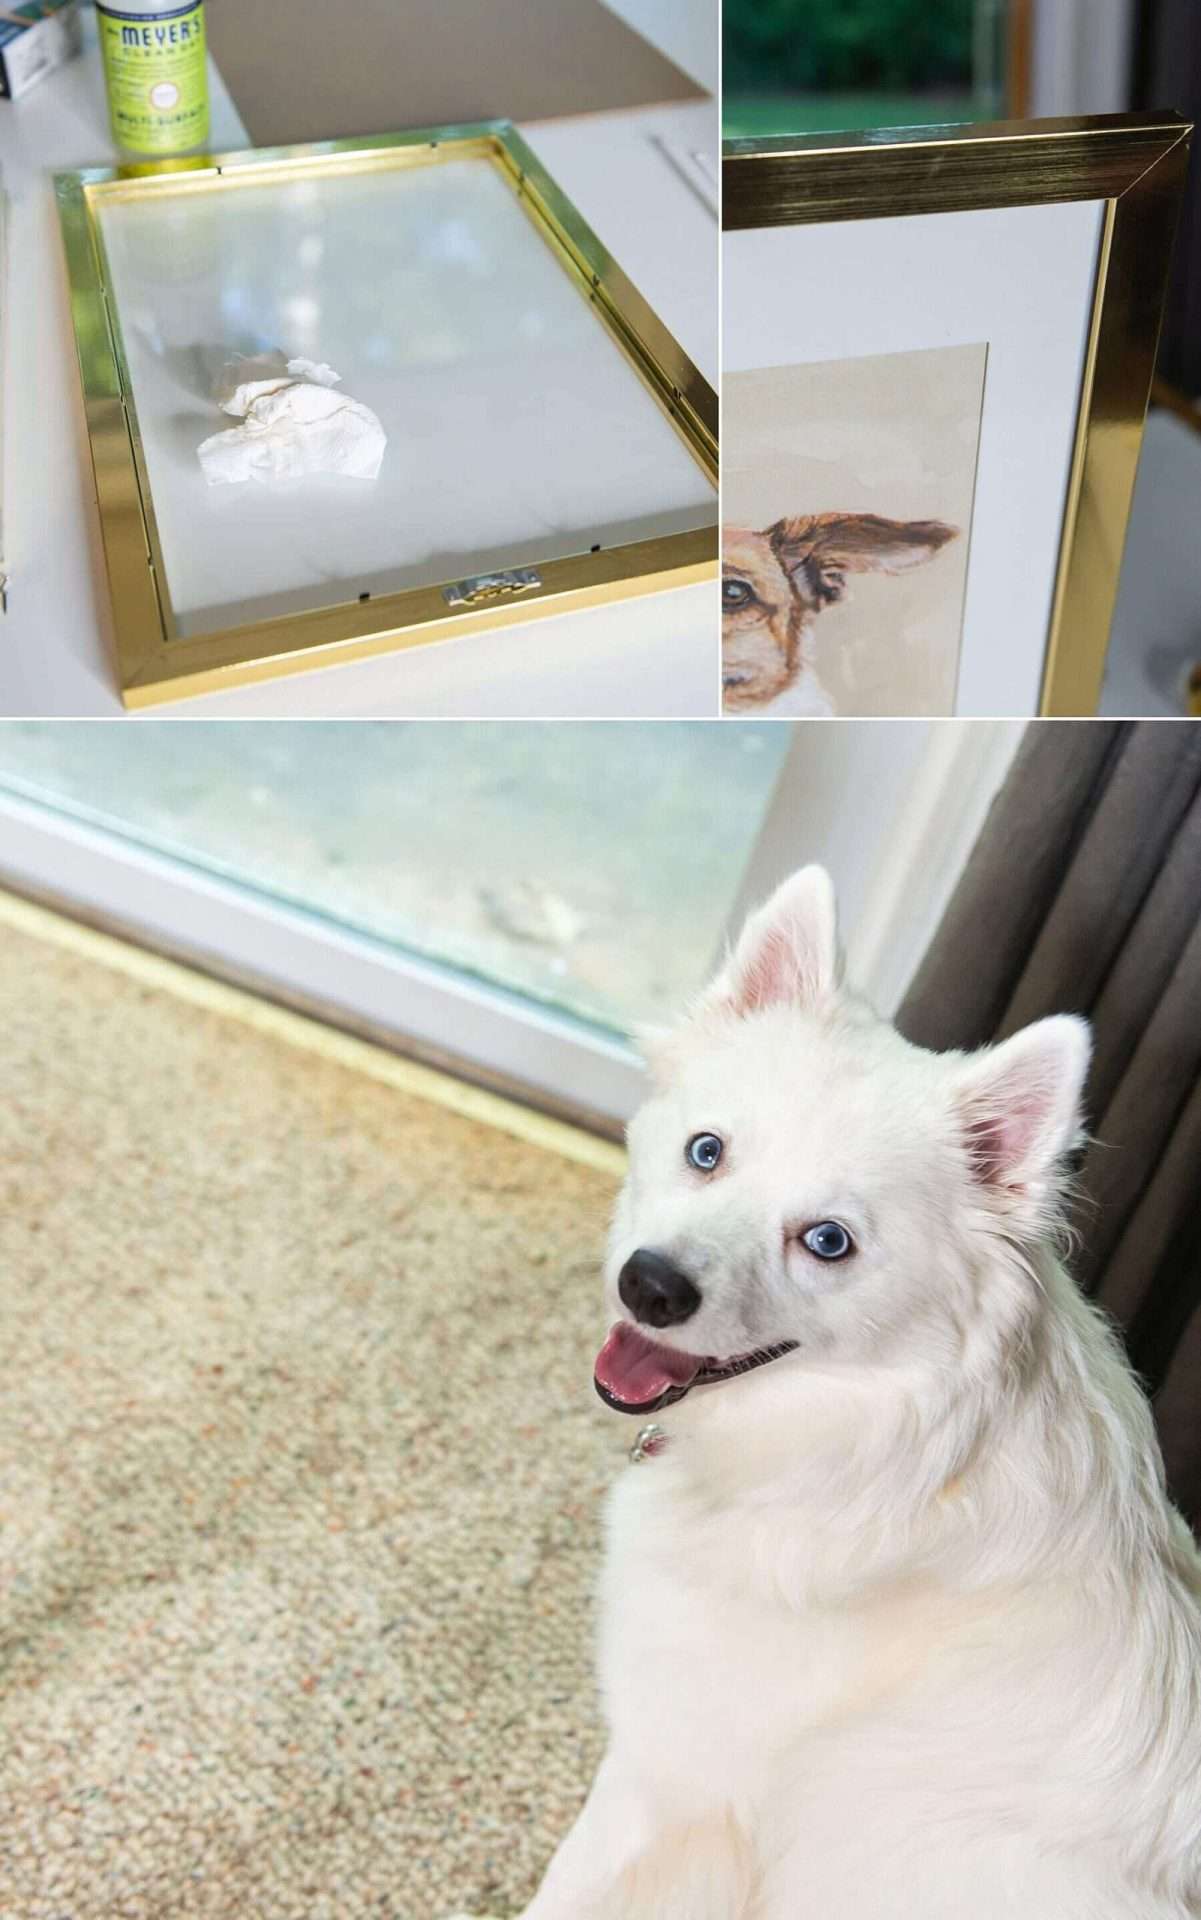
Pet Owner Tip — make sure to clean the glass (and dog hair away from the surfaces 🙂 Pink was intrigued.
Here’s how to seal the back of your frame.

Framing Pastels Without a Mat
You can do this—but carefully.
Think of it like a sandwich:
Backing board → spacer → glass
Use thin, nearly invisible spacers (black or clear work best) and ensure nothing touches the surface of the painting. This method works best for modern framing styles.
- Mount the board to the painting but mount it almost flush wrap the hinge tape to the back of the mounting board
- Use spacers thin so they are invisible unless looking from the side (spacers will probably be visible if someone looks close from the sides so I use black or clear)
- You can tape this with clear scotch tape to make it easier to put into the frame (do it so it doesn’t show past the frame edge)
A few final pastel-care reminders
- Avoid direct sunlight (fading happens)
- Don’t shake or flip framed pastels upside down
- Always start with clean, dry hands
Want to outsource instead?
Totally fair. Framing takes time—and sometimes peace of mind is worth it.
Great online framing options:
You can do this 🤍
Framing pastel paintings doesn’t have to be scary. Start slow, handle gently, and remember—you’re caring for art, not defusing a bomb.
If you try this, I’d love to hear how it goes.
What part of framing feels most intimidating to you right now?


